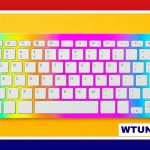
Ducky keyboards usually let you adjust backlighting directly from the keyboard, without requiring a desktop application. You can switch between preset effects, change brightness, select colors on supported models, and adjust animation speed using function-key shortcuts.
The exact controls depend on the keyboard model, firmware, and lighting type. The Ducky One 2 Mini RGB has its own onboard shortcuts, while other Ducky keyboards may use different key combinations. Use this guide to understand the process, then check your model’s manual for the precise commands.
How Ducky keyboard lighting works
Most Ducky lighting adjustments are stored on the keyboard itself. This makes the settings portable: after configuring the board, the lighting can remain available when you connect it to another computer. It also means you may not need dedicated customization software.
Depending on the model, the available options may include:
- Static colors or preset color combinations
- Rainbow, wave, breathing, and other animated effects
- Reactive lighting that responds when keys are pressed
- Brightness adjustment
- Animation-speed adjustment
- Per-key lighting or selected-key illumination on supported versions
Change lighting on a Ducky keyboard
Start by locating the keyboard’s Fn key. Ducky lighting features are generally accessed by holding Fn while pressing another key marked for lighting, modes, brightness, color, or speed. On compact keyboards, including the Ducky One 2 Mini, these functions are often assigned to keys that do not have room for separate lighting buttons.
- Connect the keyboard and make sure it is receiving power.
- Hold the Fn key.
- Press the key assigned to lighting modes to cycle through the available effects.
- Use the model’s brightness, color, or speed shortcuts to refine the selected effect.
- Release the keys and check whether the keyboard retains the new setting.
Some effects only support preset colors, while others allow a broader range of color adjustments. If a color shortcut appears to do nothing, switch to a static or color-adjustable mode first. Animated modes may expose different controls from single-color lighting.
How to change the color on a Ducky One 2 Mini
To change the color on a Ducky One 2 Mini RGB, first cycle through its lighting modes until you reach one that supports color selection. Then use the keyboard’s documented color or hue controls to move through the available shades. Brightness and animation speed are typically separate adjustments, so changing the color will not necessarily change how intense or fast the effect appears.
The One 2 Mini has limited space for dedicated controls, and shortcuts can vary by revision or firmware. For that reason, do not assume that a shortcut for one Ducky model will work on another. The keyboard’s quick-start guide or the model-specific manual is the best reference for identifying the correct combinations.
Choosing a useful lighting setup
- For work: Use a steady, moderate-brightness color to reduce distraction.
- For gaming: Choose a high-contrast color or a responsive effect if it helps you locate frequently used keys.
- For recording or streaming: Lower the brightness or disable fast animations if the lighting causes unwanted visual flicker on camera.
- For dark rooms: A soft static color can improve visibility without the distraction of a constantly changing effect.
If the lighting controls do not respond
When a lighting shortcut does not work, begin with the simplest checks:
- Confirm that you are using the correct Fn key and the shortcut listed for your exact model.
- Check whether a function lock or keyboard lock is preventing alternate commands.
- Try cycling through modes before attempting to change color or speed.
- Disconnect and reconnect the keyboard, preferably using another USB port.
- Test the keyboard on another computer if the controls still appear unresponsive.
If the lighting is uneven, individual keys remain dark, or colors do not match, the problem may not be a shortcut issue. Consult the manual for the model’s reset procedure and any available firmware instructions. A reset can return lighting settings to their defaults, so use it only after noting any configuration you want to recreate. Persistent problems may require assistance from Ducky support.
Find the correct shortcut for your model
The most reliable way to change Ducky keyboard lighting is to identify the exact model and follow its official key map. Once you know which shortcuts control modes, color, brightness, and speed, onboard lighting becomes quick to manage and remains convenient when the keyboard moves between computers.