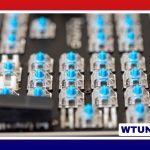
A keycap puller is a small tool that makes keyboard maintenance easier and safer. It helps remove keycaps for cleaning, customization, troubleshooting, and access to hot-swappable switches without relying on fingernails or improvised tools. The basic technique is simple: grip the cap evenly, pull straight upward, and avoid forcing anything that feels stuck.
What a keycap puller does
Keycaps fit onto the stems of mechanical switches, and some larger keys also connect to stabilizers. Removing them by prying from one side can put unnecessary stress on the keycap stem, switch, or stabilizer. A purpose-built puller grips opposite sides of the cap so the lifting force is more balanced.
Use a puller when you need to:
- Remove dust and debris from beneath the keycaps
- Replace a keycap set or change a keyboard layout
- Inspect a sticky or inconsistent key
- Reach a hot-swappable switch for replacement
- Work on stabilizers or other keyboard components
Choosing the right puller
The two common designs are wire pullers and plastic ring-style pullers.
- Wire pullers: Two metal loops slide beneath opposite sides of the keycap. They usually provide a controlled grip and are less likely to press against the keycap’s top surface.
- Plastic ring pullers: A molded ring grips around the cap. They are convenient and inexpensive, although some can fit tightly or be awkward on unusual keycap shapes.
A wire puller is often a practical choice for regular maintenance because it works with many standard keycap shapes. Whichever style you use, check that the tool fits beneath the cap rather than scraping across its lettering or surface. A keycap puller is different from a switch puller: the latter is intended to remove switches from compatible hot-swap sockets.
How to remove a keycap
1. Prepare the keyboard
Turn off the keyboard or unplug it from the computer. This prevents accidental key presses while you work. If you are removing several caps, take a quick photo first so you can restore their positions and orientation later.
2. Position the puller
For a wire model, place the two loops on opposite sides of the keycap and press down until they pass beneath the lower edges. For a ring-style model, center the ring over the cap and press gently until it grips the sides. Keep the tool as level as possible.
3. Lift straight up
Apply slow, even upward pressure. The cap should release from the switch stem without a sharp jerk. If it does not move, check that the puller is properly engaged on both sides, then try again with a small, controlled movement while continuing to lift vertically.
Do not twist aggressively, pry sideways, or yank at an angle. A cap that remains unusually tight should be reassessed rather than forced, since excessive pressure can damage the stem or the cap.
Removing larger stabilized keys
Spacebars, Shift, Enter, and Backspace keys may use stabilizers in addition to the central switch. They need more care than ordinary letter and number keys.
Grip the keycap near its ends and lift gradually, keeping both sides moving upward together. Once the cap separates from the central switch, check whether its stabilizer inserts or wires are still engaged. Do not bend the wire or pull one end sharply from the side.
Before removing a large key, note how the stabilizer is positioned. This makes reassembly easier and helps prevent a key from feeling uneven or rattling afterward.
How to reinstall keycaps
- Identify the correct key and orientation, especially if the set has a sculpted profile.
- Align the opening on the underside of the keycap with the switch stem.
- For stabilized keys, align the stabilizer inserts or wire before pressing down.
- Press the cap straight down with even pressure until it is fully seated.
- Press the key several times to confirm normal travel and return.
If a key sits crooked, feels unusually stiff, or does not return properly, remove it and inspect the alignment instead of pressing harder. On a large key, a stabilizer that is not seated correctly is a common cause of uneven movement.
Cleaning while the keycaps are off
With the caps removed, use a soft brush or suitable compressed air to clear loose dust from the keyboard. Clean the keycaps separately with a gentle method appropriate for their material, and allow them to dry completely before putting them back. Moisture should not be introduced into the switches or electronics.
Keep removed keycaps organized in a tray or arrange them in a layout pattern. This prevents mix-ups and makes reinstallation faster, particularly when several keys have similar shapes.
Common mistakes to avoid
- Using a screwdriver, knife, or other sharp object as a lever
- Pulling from only one side of a keycap
- Forcing a cap that does not release with reasonable pressure
- Scraping legends or printed surfaces with the puller
- Reinstalling a stabilized key without checking its wire and inserts
- Connecting the keyboard before all parts are secure and dry
Once you have used the correct puller a few times, keycap removal becomes a routine part of keyboard care. A patient, vertical lifting motion protects the caps and switches while making cleaning, customization, and basic maintenance much more manageable.